Tuesday 28 May 2013

Subelectro cab. No more rot.

With a long weekend ahead and good weather forecast, I decided to try and get the Subelectro cab back on its feet and get rid of all the remaining rotten chipboard. I was pretty much a case of using a jigsaw to cut away the damage then reconstructing the cab using new wood. I also primed and painted the new section of cab, sanded and sprayed the marquee holder and metal control panel, coupled with starting to put components back into the cab. Photos below. Enjoy :)

Completely rebuilt base of cab
Primed and ready for top coat
I decided on dark brown as the colour instead of the usual black

Mains transformer and monitor being reinstalled

Marquee section complete, cpo sitting loose. I also fitted some new rubber matting at the base of the cab which was originally there.

I'm pretty damn happy with the results so far. The G07 monitor fired up which was a bonus to say the least. I couldn't get my test board to sync up correctly but I'm sure that was more to do with me rushing to test it with loose wiring than it being an actual fault. I also made an adapter to Jamma for the Hunchback board that was in the cab which I fired up on my test rig.

Hopefully in my next post, the cab will be pretty much complete, with controls reassembled, and with any luck I'll have decided which game/s will run in the cab.

Regards, Mart.

Wednesday 15 May 2013

Subelectro Cab. Rotten Chipboard

Well I know the cab had some rot, after moving it around the garage to make some space one side of the base gave way.

Flipping it onto it's back and removing some rubber matting I was presented with this:

Rotten Chipboard at its best!

The was only one thing for it. It had to be removed, so out came the jigsaw and hand saw and below is where things currently stand.

Most of the rotten chipboard is gone

I still have more wood to chop away from the left side, I think I will probably make a complete new base section and fix it onto what remains of the existing cab.

Sunday 12 May 2013

Subelectro Hunchback.

I just picked up this cab from ebay today, it had been stored in a farm barn for years and had a been home to a mouse... The bottom of the chipboard cab has been ruined by the damp or mouse pee.
I'm not sure what is going to be done to this cab yet.... Photos below:

In the back of the car before being unloaded at home

Paper instructions and an official License sticker 

PCB. Is this a Hunchback board?

A fairly popular game going by the coin counters

Greeted by this when the rear door came off.


Cleaned up marquee.


Sunday 5 May 2013

Pole Position. Gas Pedal & Metal work

Well its been awhile since I have posted anything about my Pole Position cab. I am making progress, just juggling work between all the project cabs need to get working.

I have now put a Wells & Gardner 19K series in from one of my old Jamma cabs which I sold, this was handy as it runs in 128V which the Atari Power brick provided for the original monitor.

As we've had some warmer and drier weather, I've progressed with tidying the marquee holder metal work and the foot pedal.

Below is the before photo of the gas pedal:

Original Condition of the gas pedal.

The metal work was sanded with a hand sander and then primered up. The actual foot pedal is not painted. it's just metal with some grip tape on. So after a sanding and a wipe over with some isopropyl alcohol, I put on a few coats of some primer which can be seen in the photo below. It looks really good in a matt finish, but this will need a top coat to finish it off.

Priming the metal work before the top coat.

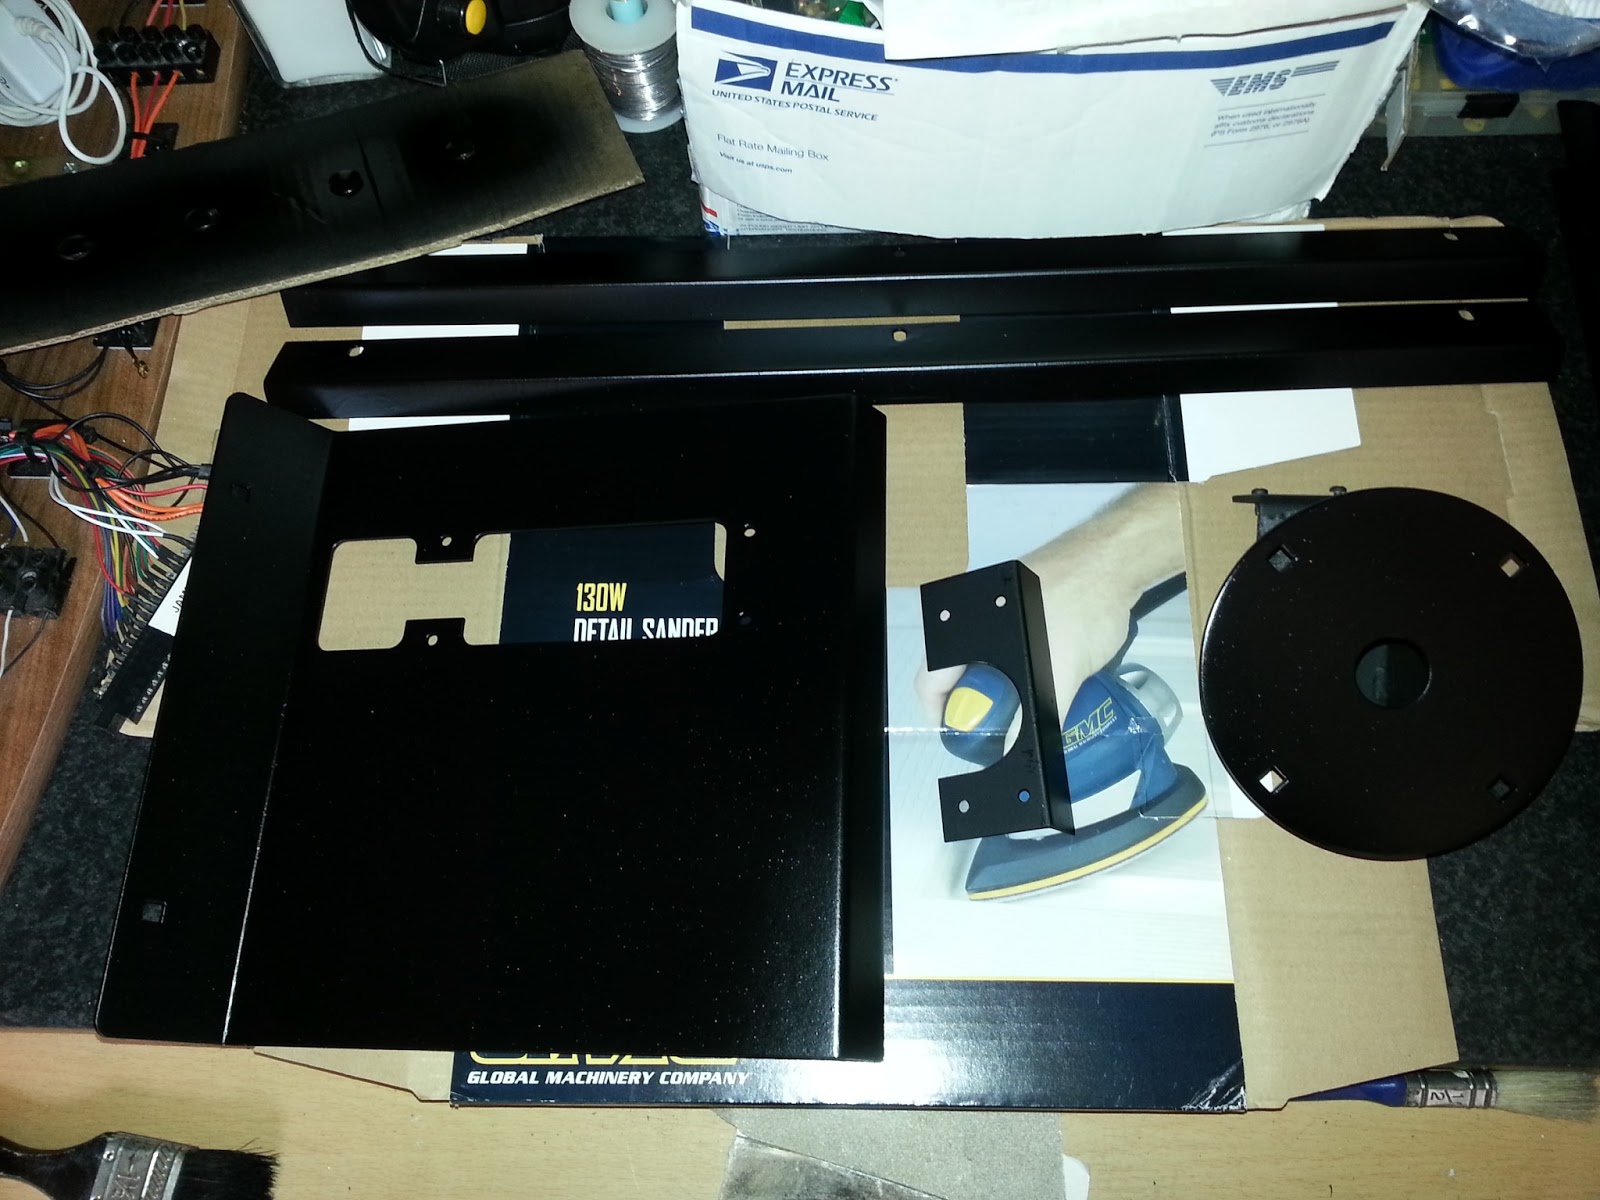
One day later and the dry weather still with us, I added a few coats of some satin black spray, I finish isn't perfect, but overall it will do for what is going to be a 'players' cab and not some mint machine ready for a museum!

Top coat applied to the Pole Position metal work.

I also sprayed the metalwork from the steering wheel assembly as it was visible even when the wheel was fitted and it would have looked out of place if I had done the other parts and left this out.

After reassembling the gas pedal and using some skateboard griptape it now looks like this:

Complete Gas Pedal, not perfect paint but it'll do!

Here's some front shots of the cab showing the metalwork above and below the marquee and the steering assembly.
Steering wheel mount.

Steering Wheel assembly completed.Could do with a new Atari sticker on the wheel.
Resprayed paintwork on the marquee holder metal work.
I need to give the same treatment to the Coin Door and the coin box and maintenance panel which sits inside the coin door. After that I pretty much need to make a replacement back door, hunt down a working game board and start playing... Prepare to Qualify.... coming soon!